Wednesday, July 27, 2011

Rocket World - Customizing the Avatar

I entered the Rocket World EMMS. My avatar was a generic female, running around in tight red pants. I rather liked the pants, but I needed to customize "Ruth" a bit, so she could become me. Or the virtual wanna-be.
I started by right-clicking on the avatar and clicked on Appearance. A window popped up with Body Parts and Clothes to customize. You could choose the avatar to wear them right away and you could also store them in Inventory (bottom right-hand corner). If I could not modify a body part or an item of clothing,
I created them from scratch.


Customizing hair, eyes, brows - shape, color, style.
The Appearance window gives you options to choose the body part color or shape with a sliding scale.


Customizing the clothes - top, pants and shoes - style, shape and color.
I was able to try out different options and either choose to wear them right away or store them in the Inventory for later.


Customizing the outfit - jacket - style, shape, color.
I picked a jacket to go over my skimpy top - after all She attends Boston College!


It is a final exercise from the Immersive Education course that I am taking at Boston College. The course is called Discovering Computer Graphics. For details, visit the immersive BC portal at http://ImmersiveEducation.org/@/bc

Monday, July 25, 2011

Final #1 (Flash / Powerbullet.swf files)

Powerbullet Assignment 4
with links to Powerbullet Assignments 1, 2 and 3

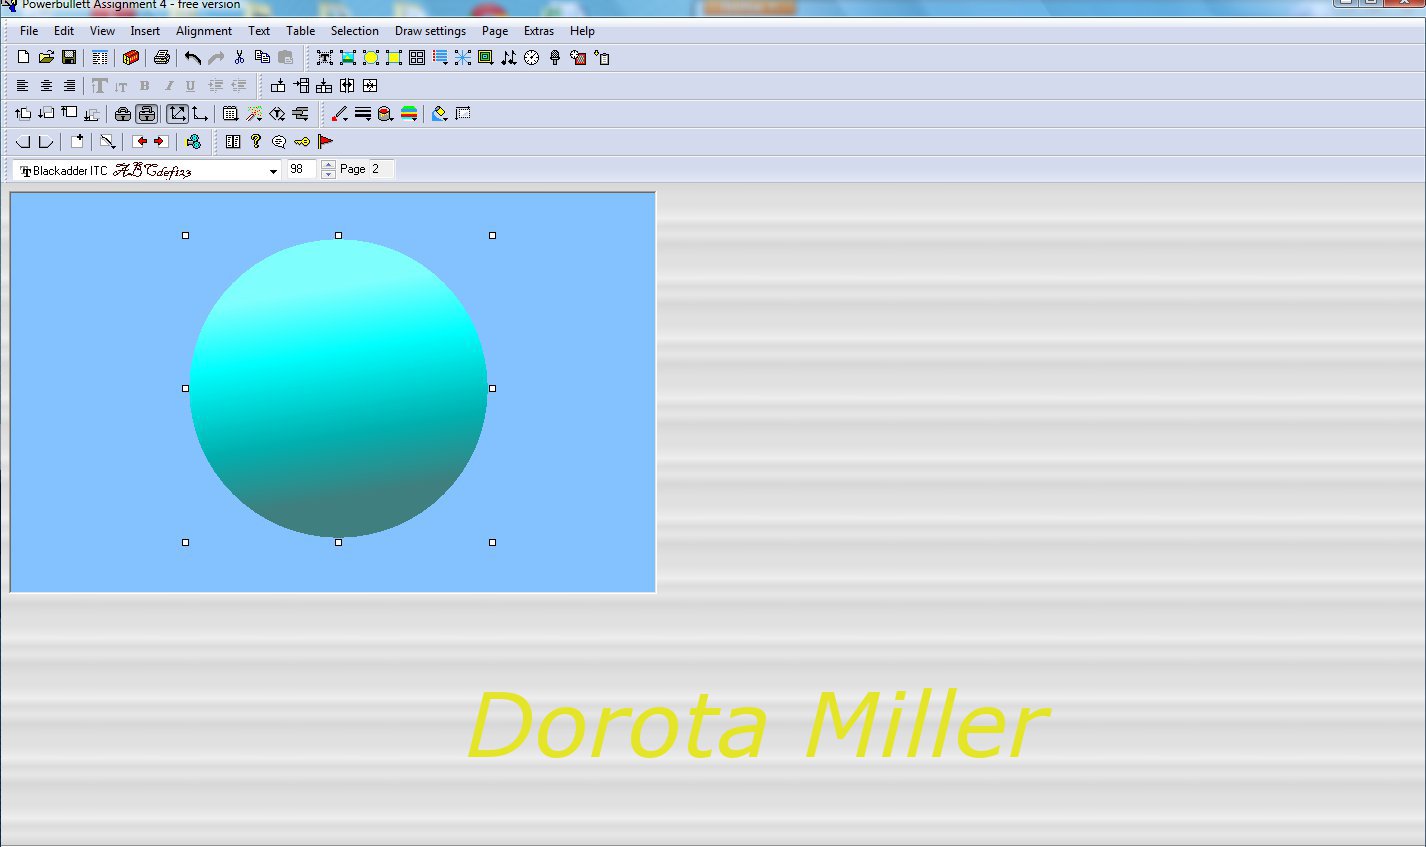
In this assignment I created a three-page animation - a Flash file that contains a text, an object and an image. After creating the first page, a Flash file that animated a text, I added the second Page (a page icon with a + sign on the Page toolbar) on which I created a Flash file that animated an object. Then I added the third Page, where I created a Flash file animating an image. To move between the pages, use arrow signs on the Page toolbar. You can only Preview each page separately. You can chose a different animation for each page, however you have to select the animation settings for the whole three-page file.


For details on how to create a text animation, go to Powerbullet Assignment 1.


For details on how to create an object animation, go to Powerbullet Assignment 2.


For details on how to create an image animation, go to Powerbullet Assignment 3.


Powerbullet Assignment 4 Loop

Powerbullet Assignment 4 with Navigation Controls


It is a final exercise from the Immersive Education course that I am taking at Boston College. The course is called Discovering Computer Graphics. For details, visit the immersive BC portal at http://ImmersiveEducation.org/@/bc


Saturday, July 23, 2011

Powerbullet Assignment 3

In this assignment I animated an image. I inserted a bitmap image (a JPEG photo of my Kitty) through Insert -> Image. I positioned it in the middle of the page.


I added a frame to the photo - the detailed steps are described in Powerbullet Assignment 2.


Then I added a background color that would go well with the photograph. I chose an animation (see Powerbullet Assignment 1) and Exported the File, having Previewed the page first.


Powerbullet Assignment 3


It is a final exercise from the Immersive Education course that I am taking at Boston College. The course is called Discovering Computer Graphics. For details, visit the immersive BC portal at http://ImmersiveEducation.org/@/bc

Powerbullet Assignment 2

Here I am creating a Flash file that will animate an object. I chose a New file from the File menu command. First I set Background color (for details see Powerbullet Assignment 1). Then from Insert command I chose the object shape I wanted to animate: I picked a Rectangle.


Having selected the shape, I accessed Fill color and Gradient setup - available from the Draw settings command or from the Draw settings toolbar. You can play with the color to create a custom color for your object. Gradient setup is fun: you can choose how many layers or shades your color will have and what direction they will take.


Next I added a frame to my object by selecting another Rectangle. While the first rectangle, the object itself has a Fill (right-click on the selected object and choose Item properties), the frame needs to be 'empty', i.e. have no fill, but an Outline. At the end I animated the two objects, just like the Text in Powerbullet Assignment 1 and having Previewed the animation, I Exported the file to save it.


Powerbullet Assignment 2


It is a final exercise from the Immersive Education course that I am taking at Boston College. The course is called Discovering Computer Graphics. For details, visit the immersive BC portal at http://ImmersiveEducation.org/@/bc

Powerbullet Assignment 1

I opened Powerbullet I chose New from the File menu to create a new animation. I am creating a Flash file that will animate my name using text. First I created a purple page by going to Draw settings -> Background color. The feature can also be accessed on the Draw settings toolbar - hover over the icons until you find Set background color. Then I clicked on Insert command on the Menu and chose Text. I wrote my name and set the font type, size and color. You can do that by going to Text command on the main Menu, or through the Text toolbar.


I positioned the text frame on the central spot on the page. To animate the text, make sure the Text frame is selected, then go to Selection on the main Menu and Animation and effects. You can choose the Type of animation you want from the drop-down menu. You can go to Page -> Preview to see what the animation looks like, or simply use the Preview button on the bottom Toolbar, which looks like an old-fashioned film projector.


Through the Export settings, which can be accessed from the File command,  you can decide if your animation will be flashed once or continuously (Loop needs to be check-marked ). If you are happy with your animation, you Export the file (File -> Export), which will save the animation on your hard drive. In order to have your animation on the Internet you need to upload the .swf file to your website.
Click on the link below to see the animation.


It is a final exercise from the Immersive Education course that I am taking at Boston College. The course is called Discovering Computer Graphics. For details, visit the immersive BC portal at http://ImmersiveEducation.org/@/bc

Wednesday, July 20, 2011

Roll Calls Screenshots

Roll Call 1, Class 1

Roll Call 1, Class 2

Roll Call 1 & 2, Class 3

Roll Call 1, Class 4

Roll Call 2, Class 4

Roll Call 1, Class 5

Roll Call 2, Class 5

Roll Call 1, Class 6

Roll Call 2, Class 6

Roll Call 1, Class 7

Roll Call 2, Class 7

Tutoring

I tutored a colleague for 1 hr on Midterm #7 exercise on Monday, July 18th. We went over layers in Gimp, copying, scaling and pasting an image into layers. We worked with transparency/opacity, filling the selected area using color and tools like Rectangular Tool, Ellipse Tool or Text Tool. In the course of going over the assignment, I was re-doing the exercise so I could better explain what I did while working on my Midterm #7 as well as to try out different ways to achieve a given result. Here are screen shots I took while tutoring:


Sunday, July 17, 2011

MIDTERM #8

Original Photo

Touched up

I downloaded a JPEG image of myself and used GIMP to remove blemishes and smile lines from my face using the smudge and blur tools. Fortunately, I did not find any wrinkles to touch up yet!  

This is assignment is MIDTERM #8. It is a midterm exercise from the Immersive Education course that I am taking at Boston College. The course is called Discovering Computer Graphics. For details, visit the immersive BC portal at http://ImmersiveEducation.org/@/bc

Saturday, July 16, 2011

MIDTERM #7


Here are the steps I took to do the assignment:

I found a photo of Albrecht Dürer's Self Portrait on the Internet.
This is the original photo I started work with.


I created an XCF file in GIMP and started working on it.


First I cropped the original photo to have the person as the main focus of the image. Then I created a new layer to create new eyes for the image.


I opened the logo as a new image and cropped it with the circular tool
to change the shape from rectangular to circular.

I pasted the logo to make new eyes and anchored them onto the new layer.
First one eye...


... and then the second one.


Then I started working with the rectangular tool to add a bottom banner and text.
I did it through additional layers.


I chose a font and color for the 3 different lines of text.


This is the final image saved in JPEG format.

This MIDTERM #7. It is a midterm exercise from the Immersive Education course that I am taking at Boston College. The course is called Discovering Computer Graphics. For details, visit the immersive BC portal at http://ImmersiveEducation.org/@/bc
MIDTERM #4

I entered the Rocket World and went on a little trip.
First I explored the Earth, then flew to the Moon.
I did not encounter anyone, so I went on to the Stars. It was very eery there...
I needed some solid ground, so I landed on the Mars.
I found a cozy cube to sit on. I climbed up and took a shot.
Maybe I will see you all there next time!

Entering the Earth
Entering the Moon
Entering the Stars
Entering Mars
Greeting Card from Mars

This is MIDTERM #4. It is a midterm exercise from the Immersive Education course that I am taking at Boston College. The course is called Discovering Computer Graphics. For details, visit the immersive BC portal at http://ImmersiveEducation.org/@/bc